n

Showing posts with label Elianto. Show all posts

Saturday, May 28

Nail Art Tutorial: Hello Kitty


Thank God for this wonderful day! I am so blessed with very good friends. I only got few friends but I make sure that every friendship I have, they are very special. One of my most treasured friend is "Aper" (Jennifer Tan-Ching) in fact her daughter is my God-daughter and her son is my dear "H's" God-son. Since Shawn will be with his Lola Vie, we decided to visit the Ching's Crib plus I wanted to do a hello kitty nail art for my God-daughter AJ (Aper's daughter) as I promised her. AJ will be turning 5 y/o this coming June, time really flies children grows so fast and boy oh boy!!! I can really run out of answers and giving reasons to her! As a matter of fact she even asked me lots of questions while I was doing her nails. The question that got me speechless was when she asked me "ninang why does Hello Kitty doesn't have a mouth?" ;) Smart and very curious kid huh?! Then her mom was scolding her because her nails were so small because she has this habit of biting them, she told her mom- "Mommy, if my nails were bigger it won't be called "Hello Kitty " anymore. It will be "Hello Cat" already". Hahaha... Kids does say the darnest things!

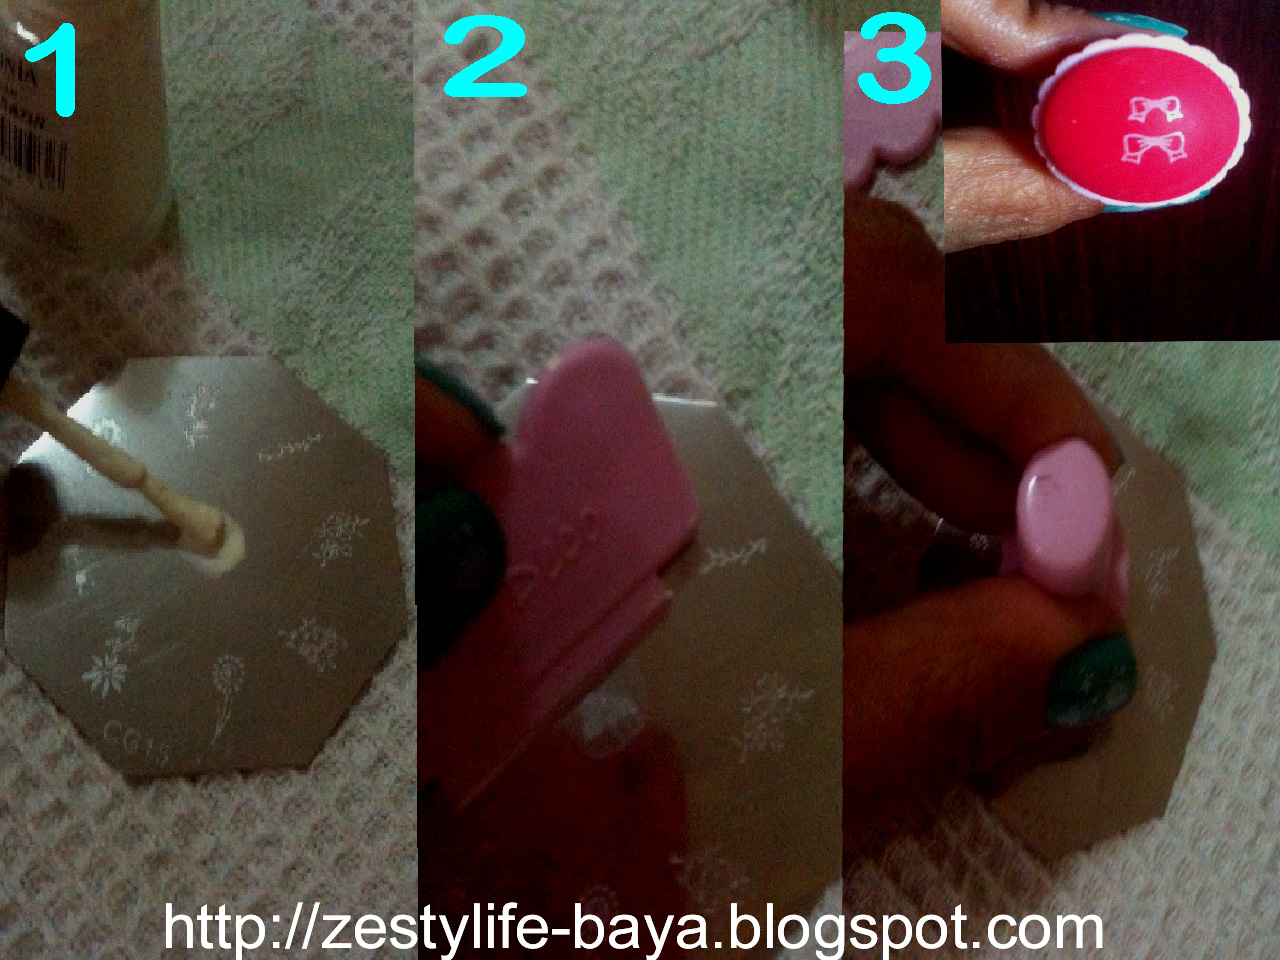
So here is how I did her nails. 
(Since AJ's nails were so small I used mine for the demo).


Materials needed: Nail polishes- white, black, red, yellow and clear for the top coat Nail dotter or you can just use a toothpick Fine bristled brush


1. Use white nail polish for the base color.


2. Dab the nail dotter to a yellow nail polish as shown above for the nose.


Show in this photo is where the nose of Hello Kitty would be. Dotted almost at the center.


3. Using a black nail polish, dot it on the nail for Hello Kitty's eyes.


4. For the ribbon, I made 3 red dots. The center dot smaller than the dots on the sides as shown above.


5. Using the fine brush, draw 3 whiskers on each side.


6. Using the fine brush again, outline the nose & the ribbon.


7. Lastly, apply a clear top coat to seal it make it glossy but make sure to let it dry to avoid smearing the details.


Jaran!!! AJ's cute little nails!


One happy client! Hehehe... Very good atchie!!! She behaved very well while I was doing her nails.

Check out for the my other Nail Art Tutorials (Pls. click the links below)
Cute Flower
Summer Bloom
Burberry

Have a happy weekend!

 - Posted using BlogPress from my iPhone

Saturday, April 23

Nail Art Tutorial: Cute Flower


This is another nail art tutorial in time for "Flores de Mayo". I remember when I was a kid way back in Iligan City when my father was assigned there and we live just at the back of the Church there. During the month of May, we will join a summer class during the month of May and we have a mini parade of different flowers. It inspires me to do this nail art. This can be done by beginners too, so easy to do.

Material needed:
basecoat
nail polish (any color) for the base canvass
dotter tool
topcoat polish
for this nail art I choose a dark lavander shade for the base
as you can see I put on a yellow shade of polish dotted just on the side
next step: dip the dotter tool onto a fuschia shade nail polish
and just dot around 5 dots encircling the yellow dot
ta-da!!! now you've got a cute flower. =)
I choose to have 1 flower on the side of each nail to make it simple.
heres the finish look
Try this other nail tutorial of mine Summer Bloom
Happy Easter everyone! 

Follow my blog with bloglovin

XOXO

Saturday, March 26

Nail Art: Burberry


 Nail art tutorial featured here is my version of the Burberry like plaid print. There are lots of nail art tutorial like this over the youtube.

Nail polishes I used are:

a. basecoat from Elianto
b.ORLY in Country Ckub Khaki for my base color
c. topcoat with gold glitters
d. clear coat from Elianto
e. Sassy Nail Art polish with fine brush
    (photo showed below)


Sassy Nail Art polish with fine brushes in
red, white and black
(can be bought at Watson's for 24 pesos)


Apply base coat then let it dry for a sec. then followed
by the basecolor (ORLY- Country Club Khaki)
Let it dry before proceeding to the next steps.

Apply the white nail polish with fine brush horizontally.


Apply another white nail polish horizontally, make sure to
leave a small space in between.


Apply a black nail polish horizontally in between the 2 white lines.

Apply another horizontal lines using black nail polish
above and below each white lines as shown above.


Apply white nail polish this time in vertical lines. Leave a small space
in between the 2 lines as shown above.
(this photo is edited thru photosop as I accidentally erased
the pic I took for this step)


Apply black nail polish vertically in between the white lines you did earlier
then apply another 2 lines to the left and right of the white vertical lines.


Lastly, apply another horizontal line with nail red polish as shown above.
Let it dry completely then apply the glittered nail polish and apply the
clear topcoat polish.


Hope you like this design, very classy and neat. I did this nail art on my own though I have a hard time doin this to my right hand since I am a right handed person. You can do this also! Just practice, practice and practice. Enjoy the weekend and till next time. =)

http://i68.photobucket.com/albums/i10/bayasy/qoutebora2-1.jpg

Thursday, February 24

Nail Art: My DIY Nail Stamping

 I can almost smell summer and I love love summer! If you'd let me choose where to go on a vacation I would rather choose to go to a beach destination. It is where I can feel very close to nature and can feel peaceful atmosphere the most.

Anyway, since summer is near I saw this nail polish at PCX yesterday and immediately called my attention! Its called Green With Envy from ORLY. I think the color is so refreshing! and suited for summer. You guys can't see clearly the color in the photos that I have taken (sorry! I'm just using my iphone) but it's like the color green of the tail of the famous mermaid "Ariel" from "The Little Mermaid".


 Things needed are basecoat, nail polish of your choice, topcoat and nail stamp kit. First and foremost have your manicure and pedicure for a neat and nice canvass. ;) Apply first your basecoat, as for me I prefer to use a nail strengthener since my nails breaks easily. Let it dry for a while then followed by applying the color base for 2-3 coats and let it dry completely (this is very important because if you don't you'll ruin your base). If you think that it's completely dry already, take out your nail stamp kit.


1. Choose a nail polish color for your stamping. I choosed a white one for this one. On the design disc, apply nail polish.
2. Immediately scrape off the extra polish with the tool provided.
3. Press the stamp onto the design you desired on the disc.

4. Press the stamp onto your own nails.
5. Apply the top coat directly onto the design if you are done.
*Optional: you can add some other designs to it also. Have fun with it!

Ain't it fun to be a gurl! *wink wink. They also offer this in some salons but its pricey so if you have time and wanna be creative do it yourself! It'd be fun and nice bonding time with "girlfriends" too!

It'll be TGIF tomorrow, I hope my "H" will ask me for a dinner or moviedate tomorrow! (so I can have a chance to show-off my newly glam nails!).